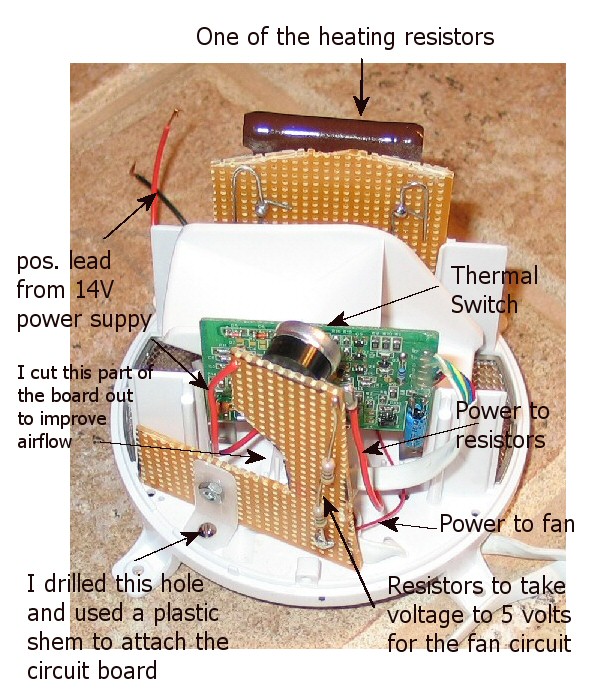
After fan aspirating the temperature probe, my next project was to heat the rain gauge so it would melt snow and freezing rain. To my knowledge there isn’t a kit made by Oregon scientific, so I decided to homebrew one. It starts by using a 14 volt power supply I had lying around. I think a 12 volt power supply would work fine too.
I got two 20 Ohm heating resistors off the net and a 25mm fan to circulate the air. I did this so the heating would be more distributed and so the resistors wouldn’t melt the rain gauge plastic, although I don’t think this is too likely. I also got a thermal switch off the net. The switch turns on the resistors and fan at 1 degree C and switches off at 10 degrees C.
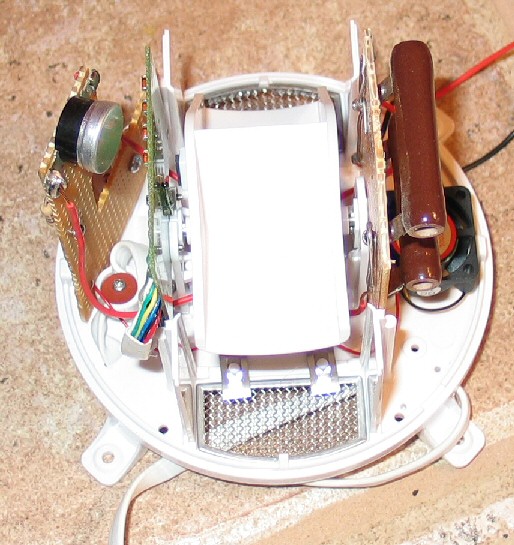
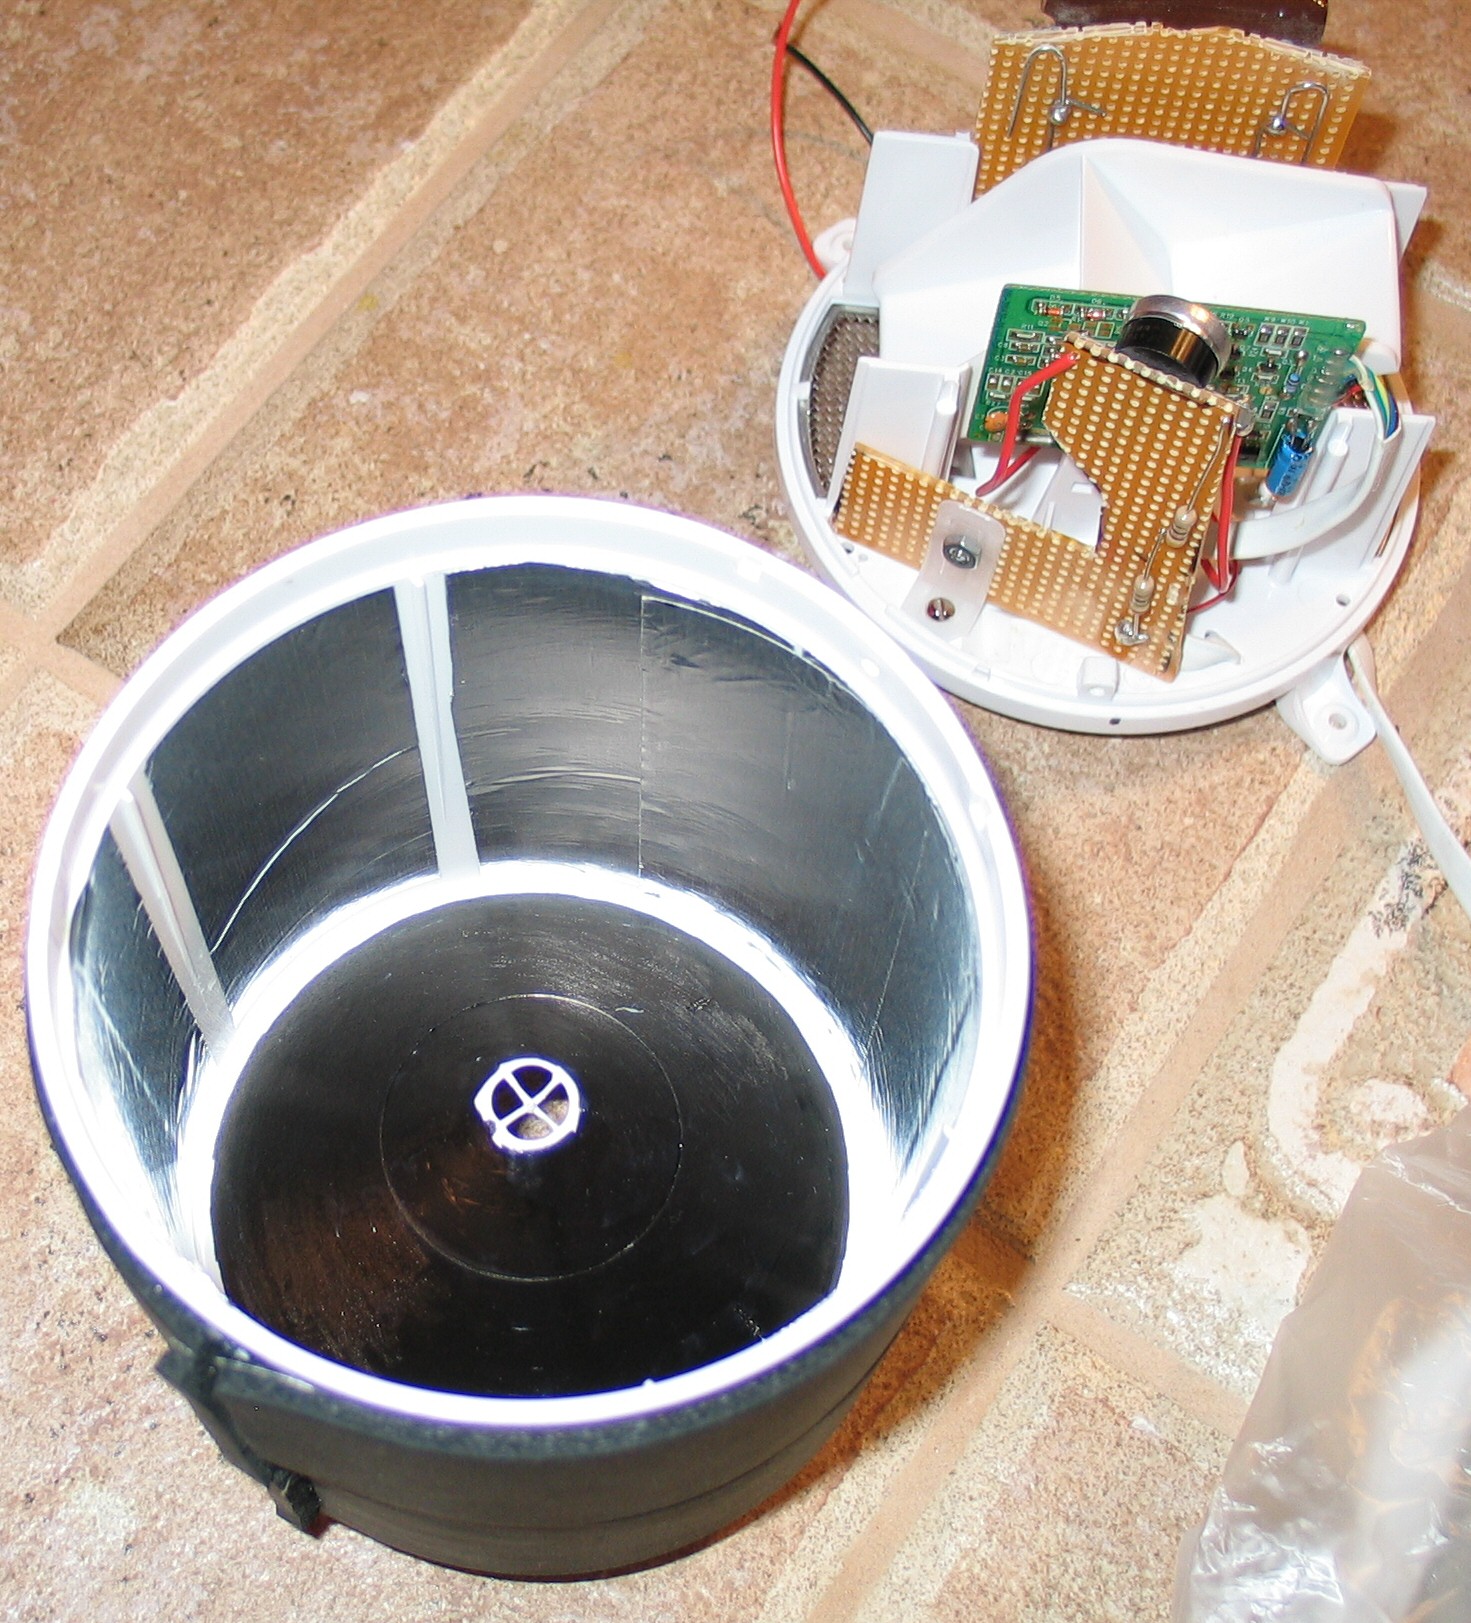
Rather than go into too much description, here are two photos that explain the design:
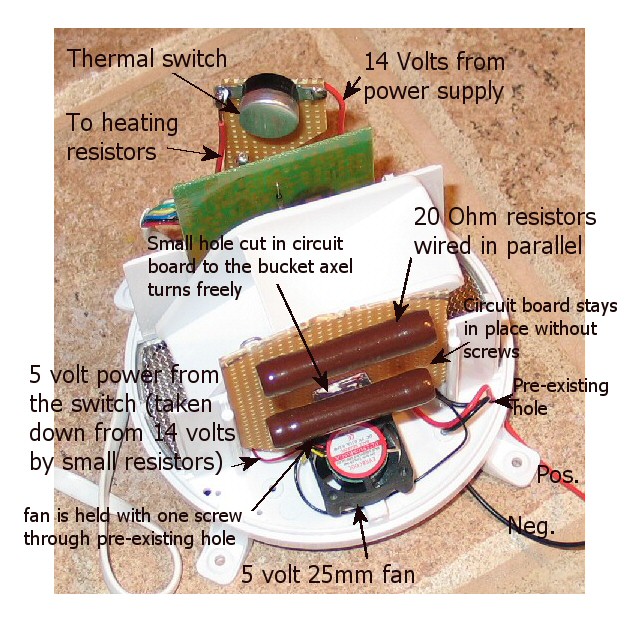
The fan is rated for four years of use but since it’s operating just a fraction of the time, I figure it should last a while, even outside. It doesn’t exactly crank out the CFMs so it has no effect on the gauge mechanism. As far as "ruining" the native hardware, other than the collecting funnel tape and black marker, this modification needed only one hole drilled in the base to support the thermal switch circuit board.
I insulated the outside of the gauge and colored the bottom of the collecting funnel black, to absorb the heat from the resistors. I also put foil tape on the inside of the cylindrical portion of the cover, to reflect as much heat back and up as possible. The fan does a nice job of circulating the air. It doesn’t blow out of the hole in the funnel at all, so it won’t interfere with water dripping into the tipping buckets.
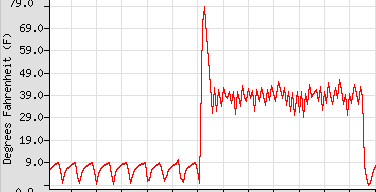
The construction is pretty self explanatory. With the 20 Ohm resistors in parallel, the design cranks out about 20 watts of power. That's plenty. The unit stays consistantly above freezing. I tested it in my deep freeze with a remote temp sensor in the funnel. Here's the result: (that inital spike is from opening the fridge to put the unit in and handling the temp sensor, ignore it.)
Parts List (with hyperlinks to where I obtained them):
1. 20
Ohm heating resistors X 2
2. 25mm
fan
3. Thermal switch
4. Resistors to reduce voltage to 5 volts for the fan from Radio Shack
5. Circuit board from Radio Shack
6. Insulating tape from home Depot
7. Foil tape from Home Depot
I estimate the total cost at about $50 US (I ended up spending more in shipping charges than for the actual parts). I will add that I had the power supply already and that would certainly drive up the price, but one can be found at radio shack for cheap. This also turns the wirelss gauge into a wired one. This is not an issue for me but certainly will be for some. One could obtain a 12 volt battery and a solar pannel to recharge it if that's a concern, but obviously that complicates things further. I will say that this design may be "over engineered". I mean, why add a fan? Well, I wanted to circulate the heat and I had one lying around from another project. Also, why use two resistors rather than just one? Well, the 8-10 Ohm resistors I found really concentrated the heat in one spot and I didn't really like that. Plus they were longer and didn't fit well inside the housing. I intentionally put the heating resistors on the opposite side from the circuit board for the rain gauge tipping bucket. With the thermal switch, one doesn't really need to unplug the unit during the summer, although I probably will. I may also add a funell to the outside to increase the collection area and improve accuracy, but heating more funnel is problematic, so I may just do that in the warmer seasons.
So far I've had no problems recording the snowfall here for about the last month, however, since it's been a dry year here in the Rockies, I've only had a couple of chances.
I’m always interested in constructive criticism, so please let me know by e-mail or by posting on discussion forums.
Also see my fan aspirated temperature sensor modification here.